Sunday 27 February 2011

Creating a photorealistic texture

I have started testing with a method for creating realstic skin for a UV Map in Photoshop.  For my tutorial, I am considering showing how to apply photographic or pre-made images to a UV Map, along with how to create new textures directly on to the UV.

In order to create a texture from a photographic source and apply it to a 3D Model, I followed a video tutorial that comes in 3 parts and can be found here:
http://www.wonderhowto.com/how-to-texture-head-using-photoshop-cs4-and-maya-376521/

I tried redoing this tutorial by using this random photograph of myself.
I exported the head model to an OBJ, as the video specified and I imported it in to a PSD file, along with my photo.  I am at a disadvantage here, because this head was not modelled against the same source that I was using for the texture.
By applying an overlay to the head model, I was able to rotate and resize it until I could get the best fit of my head in the photo.  As this is an OBJ file, I am effectively working with a 3D model within Photoshop.
The next stage set out in the video is to use the Liquify tool, that can be found under the filter menu.  With this tool, I was able to move each part of the face, such as the eyes and nose, so it was all in line with the mesh of the model.  This is demonstrated below.
Once I was happy with the alignments, I merged the photo layer with the 3d head model and this was the outcome.
As you can see, it is nowhere near finished, but I am satisfied with the outcome.  It has a similar feel to a realistic character in a computer game, which would come useful for a texturing job in the games industry.  I am also able to rotate the 3D head model in Photoshop and apply more textures on the side and back of the head, using the same method.

When I do this for real, I will probably use a volunteer and I will photograph their front, side, back and top.

It is also possible save the texture separately, so it can be applied to other UV Maps, which also allows the user to fill in their own detail manually.  Here is the 2D texture image for this head that I have just created.
If I apply this to the UV Map, I can fill in the rest of the detail and erase any mistakes, such as the eyes floating separately.

Friday 25 February 2011

3D Paint

I have started to investigate 3D paint software, to improve my texturing skills.  I have started with the 3D Paint feature in Maya, and I found this tutorial, which I followed to see what the 3D Paint tool can do.

Here is an image of a test I did with the 3D Paint tool on the head model that I am using for the tutorial.  As you can tell, I will need more practice with the 3D Paint, but I got the hang of it fairly quickly
In this first test, I just used a paintbrush that I coloured with a beige skin colour tone and I then painted hair using one of the many paint brushes that are built into Maya.

Here is another test, which I did using a flesh textured paint brush.  A little unsettling, this one.

So I have learnt the basics of 3d Painting.  I just need to discover some specific 3D Paint software to broaden my knowledge, but as of yet, I do not know of any top of the range ones.

Thursday 24 February 2011

Second Job: Texture Artist at Framestore CFC

The second job that I would like to have in the Animation industry, and one that I will be analysing my own abilities and development against is a Texture Artist Job at Framestore CFC.  This is not an entry job or junior job, strictly speaking, but there does not seem to be any junior or entry level jobs within Texturing.  Here is the advertisement from Framestore's web site.

If you are interested in future roles within the Framestore Texture Team please register your details.


Candidates should have the ability to create painterly textures from traditional painted reference material, creating both organic and hard surface textures. The successful candidate will be a flexible, creative artist with the proven ability to meet deadlines.


Skills Required:


Extensive knowledge of Photoshop
Experience in a 3D paint package
Ability to work within a team of other texture artists
Feature experience would be an advantage
Traditional arts background would be preferred


To apply for these roles you should apply online and include a link to you portfolio showing your texture work; test renders, or images of UV maps/projection maps.

The skills listed here are largely technical ones, such as extensive knowledge of Photoshop and experience in Photoshop.  I definitely have knowledge of Photoshop and I have used the software in many of my pieces over the years.  I am not sure if I would say that I have extensive knowledge yet, as I am still learning.  During this unit, I am hoping to create a realistic skin texture in Photoshop for a UV Mapping tutorial, so this should give me confidence.

As for 3D Paint, I have only dabbled with the 3D Paint that is built into Maya very briefly.  I am not very familiar with 3D Paint software so this will probably be a research job for me to do.

The advertisement also specifies a traditional arts background; that also includes using reference material to create organic and hard surface textures.  I definitely have an arts background, as I stated in the previous post; but I need to make a point of doing more painting again.  It is something that I have always enjoyed and that I will need to keep up.  Part of the reason why I am keen to be a texture artist is because something that people have always said about my artwork is that I have a good eye for colour and I think that if I was to just learn some more of the technical skills involved, I could do pretty well if I applied these creative qualities to CGI work.

This job, just like the Character Animator job and any other job within the industry, will challenge my ability to create high quality artwork, and meet tight deadlines.  The Post Production project and my UV Mapping tutorial project will test my ability to meet deadlines and I will need to document my deadlines using Shotgun.

First Job: Character Animator at Rockstar Games

The first job that I have chosen to analyse my own abilities and development against is a Character Animator job at Rockstar Games.  I came across this job on GamesIndustry.biz .  I will start by analysing the job itself and I will then contrast it with my own ability.
We would like to hear from talented animators with a range of experience & backgrounds to produce in-game animations for future projects at Rockstar North, Edinburgh.

Requirements:

  •  Minimum of 3-year degree with an emphasis in character animation or equivalent work experience. 
  •  Outstanding demo reel demonstrating strong animation ability and good aesthetic eye. 
  •  Exceptional skill in animating realistic human characters. 
  •  Thorough understanding and application of classic animation principles (staging, timing, anticipation, follow through, etc.) 
  •  The ability to collaborate and communicate effectively with a wide variety of project staff. 
  •  Consistently meet project deadlines in a timely manner without compromising artistic integrity. 
  •  Assist in the integration of animation with designers and engineers to create compelling in-game animation. 
  •  Strong interest in video games. 

 Desirable:

  •  Experience with motion capture and MotionBuilder 
  •  Professional experience developing a third person action game. 
  •  Strong traditional animation/art background. 

All applicants should be fluent in one or more of the major packages with MotionBuilder experience an advantage.

Please note: ALL applications should be accompanied by a demo reel, either on DVD or a web link.

  •  Demo reels should be no longer than 3 minutes.
  •  Sound is not important.
First of all, I am working my way to have a 3-year degree.  However, I will need to put more of an emphasis on character animation.  I feel as though my character animating skills thrived during the first year; but since I have been on the second year, I have focused less on character animation and more on other areas.  In the next projects, I will need to put myself forward for animating duties as well as the texturing and rigging that I have been heavily involved in in the past few projects.

I have some ability to work with a variety of project staff; in other words, people who have different jobs on the same project as me.  I am currently working on this skill in Post Production project, as part of a team; but it would be good to get more experience working with people from other departments as I still feel I could improve my team working skills.

As for time management skills and consistently meeting deadlines; I find that I have always been good at handing work in on time.  However, I have recently started to learn that I have poor time management skills and I find that I easily use up time designated to certain projects, because I invest too much time in other projects.  As for working to tight deadlines, without compromising the artistic integrity in a piece, this has varied; and has depended on the varying technical ability of people who I have worked with in the past.

The desirable qualities for this job involve experience in MotionBuilder; along with experience working in a third person action game and an animation/art background.  I would say that I do come from an art background as I did several art courses before I got onto this degree and I always finished them with high grades.  As for the desirable experience, I have no experience in MotionBuilder, so I may consider teaching myself another 3D software package.  I also have no professional experience in the Games or Animation industries, but then again, I am working my way towards getting experience.

From this, I have found that I would benefit from learning other 3D software, particularly MotionBuilder.  I will also need to brush up on my character animation soon to check that my skills are still up to speed.  As for my ability to work within a team and my time management skills; I am at an advantage as the two units I am doing require me to work on these.

Tuesday 22 February 2011

Analysing the brief

Initially, I had some confusion about the purpose of this blog and how it fits in with the unit.  I had looked through the brief a few times but I was unsure if this blog was supposed to be fully interlinked with the tutorial project or not.  This is why the first three posts have been focused on the construction of my tutorial, and did not say much about how what I have learnt fits with my employability.

After having a discussion with Jared, he explained that I should find an entry level job in the industry and analyse the requirements of that job against my own skills.  I will therefore be bringing work from other projects into this blog which I will analyse and contrast with the requirements in the job that I choose.

The two main jobs that I will look for are Animator or Texture Artist as these are two career paths that I am considering going into.  I should be able to link the information that I posted up previously to these jobs fairly easily.  I think it is also a good idea to study more than one job path because I will be broadening my skills and knowledge across several areas of animation.

Learning how to unwrap the UV Mesh

For the first stage of my tutorial project, I had to learn how to unwrap the mesh so that I could create a flat UV Map to put my texture on to.  In order to do this, I followed the video tutorial of Pat Imrie that I included in the previous post.

I started by applying Cylindrical Mapping to the head, which is a form of mapping that allows the user to view the whole of the model's UVs intact, as opposed to Spherical Mapping that only allows the user to view one side of the model or Automatic Mapping that splits the UVs into tiny pieces (which can be a little messy to texture).

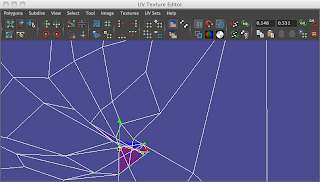
In opened up the UV Texture Editor to view the map of my model, and as you can see, there were quite a lot of problems!  As ever, click on an image to enlarge.
There were stray UVs that were far apart from the main map, uneven UVs and UVs overlapping one another.  You can see where the obvious errors are, but to see the less obvious areas are, the video tutorial introduced a button in the UV texture editor called the Toggle shaded UV display and looks like this.  With this enabled, I can see the areas where UVs are overlapping, that are highlighted in red and dark blue.  All the areas that are fine are highlighted in purple.  What I need is for the UV map to be shaded entirely purple.

First of all, I needed to stitch these stray UVs back into their place in the map, how I did this was by moving the UV using the Move pivot tool and then going into Edges mode and selecting the Sew UV Edges option from the Polygons menu.  I shall demonstrate this in the video below.

The next important stage of this process is the Relax tool, that can be found under the Polygons menu.  I used this tool for most of this stage.  I opened this tool, and made sure that the 'Pin unselected UVs' option was selected under the Pinning section.  The tutorial video explains that this is to make sure that every UV that is unselected remains in it's place before I touch it.  I also chose to use Uniform Edge Weights, as this is what is used for flattening the UVs around the face of the model.
After I sewed the UVs around the empty hole, I now had to go around each part of the face and fix the UVs.  I began with the left ear;
The thing I learnt about using Uniform Weights to relax the geometry is that it is incredibly drastic; this is fine when when trying to even out the edges of the UV Map, but when it comes to relaxing the UVs around the facial organs, it can flatten it out to the point that it becomes unrecognisable.  However, there is another option called World Space, which tries to retain the same shape as the original model; thus making life easier for the Texture artist.

Although the relax tool is very useful, I found that it also helps to use the Move tool to manually fix any remaining UVs like the earhole pictured here.

I used the World Space Relax method on the other ear, as well as the nose, chin and lips.
As for the eyes, I pretty much just used the move tool to fix it by hand.
Here is how the UV Map looks now; the next stage will be to investigate applying texture to this UV Map.
I simply fixed the left, right and top edges by highlighting the relevant UVs and using the Move tool with the Snap to Grid mode switched.

I am very pleased with the outcome of this exercise.  I feel that I will be able to do it again for the tutorial.  I am glad that I have found out about relaxing the UVs and sewing the UVs; because in the last project, I found that I was having trouble texturing Cornelius' head because a lot of the UVs were overlapping one another, especially in the nose and around the brow; and I found myself having to manually drag UVs to get the texture correct.  But I am looking forward to applying the texture to this UV Map.

Sunday 20 February 2011

Head model

In order to produce my UV Map, I needed to find a fully modeled head to texture.  I could not find anything decent on creative crash that I did not need to pay hundreds of pounds/dollars for.  I did however search Google for various 3D Models that I could use and I came across a fairly decent one on as site called SimplyMaya.  Here it is....
This is the head that I shall be documenting the UV Mapping of step by step over the next posts.  I have already come across a useful video that I will use to guide me.  I will also be sure to look for other tutorials as well.

UV Mapping Tutorial from Pat Imrie on Vimeo.

Tuesday 1 February 2011

UV Mapping Tutorial

After the success of my Cornelius model for the first Industry Exercises unit, I have now begun a new unit called Industry Exercises 2.  This unit will involve choosing a specific subject area that I am keen to improve on or specialise in and then to produce a tutorial on the subject, that can be easily understood by a beginner of animation.  I will also need produce a Project Schedule for this unit, using a program called Shotgun, so I will be able to prioritise certain tasks and organise my time better.

For this tutorial project, I was initially stuck between two specialist areas of animation; UV Mapping and Rigging.  This is because rigging and texturing are two areas that I am considering specialising in.  After discussing the options with Jared, I ultimately decided to do my tutorial on UV Mapping.  We came to this conclusion because I told Jared that even though I am better at rigging; I enjoy the texturing more and I want to become more proficient at this.

My tutorial on UV Mapping is probably going to involve a texturing something organic like a human head and this will most definitely involve creating a texture in Photoshop and aligning the UVs in the UV Texture Editor in Maya.  Rather than producing a whole new model, I will probably download a good quality model from the website to texture and UV Map, such as Creative Crash.